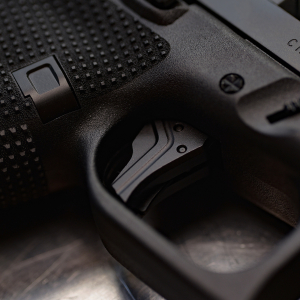
Upgrading or customizing your SIG P365 often involves swapping out the grip module. Whether you're upgrading for ergonomic comfort, adding a custom finish, or replacing a worn-out module, ensuring a smooth fit and proper function is key. A grip module swap can enhance your shooting experience—but a few common issues, like squeaks or improper fitment, can occur if the transfer process isn’t handled carefully.
This guide walks you through the essential steps to perform a successful P365 grip module swap, including transferring the FCU (Fire Control Unit), performing fitment checks, and eliminating annoying squeaks.

Step 1: Preparing for the Grip Module Swap
Before you begin, ensure you have the necessary tools and work space. You’ll need a punch tool for the pins, a soft cloth to protect the finish, and a safe place to disassemble the firearm.
-
Ensure the P365 is unloaded and double-checked for safety
-
Clear all magazines and remove any rounds from the chamber
-
Use a soft surface or mat to protect parts from scratches or damage
Step 2: Transferring the Fire Control Unit (FCU)
The Fire Control Unit (FCU) is the heart of the P365’s action. Transferring the FCU to a new grip module is typically straightforward, but it’s crucial to avoid damaging any components during the swap.
FCU Removal
To remove the FCU from the original grip module:
-
Push out the pin securing the FCU using a punch tool, ensuring the pin doesn’t slip or damage the module.
-
Gently remove the FCU, ensuring not to damage any springs or small components.
FCU Installation into the New Grip Module
Once the FCU is removed, it can be installed into the new grip module. Be mindful of the following:
-
Ensure that the FCU fits securely into the new module without forcing it into place.
-
Check for any misalignment in the trigger, trigger bar, or any internal parts as you insert the FCU.
-
Once in place, align the holes for the pins and secure the FCU with the same pin that was used in the original module.
Step 3: Fitment Checks
Proper fitment is essential for smooth operation and preventing any performance issues. After the FCU is securely in place, perform the following checks:
Check for Pin Alignment
Ensure that the pin holes on the grip module align correctly with the FCU. Misalignment can cause failure to function correctly or cause the pins to sit unevenly.
Check for Movement
Once the pins are installed, check for any play or movement in the FCU or grip module. There should be no rattling or excess movement when the firearm is shaken.
Ensure Proper Trigger Function
After reassembling the P365, test the trigger pull. There should be no sticking or irregular travel, and the reset should be crisp and clear.

Step 4: Eliminating Squeaks and Other Noise
Sometimes after a grip module swap, you may encounter squeaking or rubbing noises. These are often caused by parts rubbing together that shouldn’t be, or by friction between the FCU and the grip module. Here’s how to eliminate them:
Check for Friction Points
Inspect the contact areas where the FCU and grip module meet. Sometimes slight rubbing between the components can create squeaks. Use a small amount of grease or lubricant in these areas to reduce friction, but avoid using too much, as it can attract dirt.
Check the Trigger Spring
The trigger spring is another common source of noise. Ensure that it’s properly seated and not rubbing against any components. A misaligned spring can cause the trigger to squeak during operation.
Test for Proper Fitment of the Backstrap
Ensure the backstrap is properly fitted and flush against the frame of the grip module. A poorly seated backstrap can lead to movement and squeaks.
Step 5: Final Assembly and Testing
Once you’ve confirmed that everything is in place and properly lubricated, reassemble the P365 by inserting the recoil spring and slide. Test the pistol by cycling the slide manually a few times and dry firing it to confirm proper operation.
Test Functionality
Ensure that all components are working smoothly:
-
Check for smooth cycling of the slide
-
Test the magazine fit and ejection
-
Confirm the safety functions properly
Did You Know?
A properly installed FCU in the correct grip module should feel solid and secure, with no rattling or instability.
Conclusion
Successfully swapping your P365 grip module requires attention to detail during the FCU transfer, fitment checks, and lubrication to eliminate squeaks. When done correctly, your P365 will continue to perform flawlessly while offering improved ergonomics or aesthetics. For premium P365 components, check out our selection of SIG Sauer upgrades designed for smooth functionality and durability.
FAQs
Do I need any special tools to swap the P365 grip module?
Basic tools like a punch set and a soft cloth for protection are all you need for a successful swap.
Can I use any P365 grip module, or does it need to be specific to my model?
Make sure the grip module is specifically designed for your P365 model (e.g., P365, P365XL) to ensure proper fitment.
What should I do if the grip module is too tight after swapping the FCU?
Check for any misalignment between the FCU and the grip module, and ensure that there is no debris or obstruction blocking the fitment.
How do I eliminate squeaks after a grip module swap?
Lubricate areas with friction, such as where the FCU meets the grip module, and ensure the trigger spring is correctly seated to prevent rubbing.
Can a grip module swap affect the performance of my P365?
If installed correctly, a grip module swap should not affect the performance of your P365, but it’s always good practice to test functionality after making changes.