Setting up an M-LOK rail system is one of the best ways to customize your AR-15 or similar platform, giving you plenty of options for attaching accessories securely. However, to ensure your setup is reliable and durable, it’s essential to focus on the correct screw length, nut timing, and preventing rail rotation during use. These small details can make the difference between a solid, trouble-free build and a setup that fails under pressure.
This guide will walk you through the proper M-LOK hardware setup, including how to select the right screws, align your nuts correctly, and prevent rail rotation for a secure and stable system.
What Is M-LOK?
M-LOK (Modular Lock) is a rail mounting system developed by Magpul for mounting accessories like grips, lights, lasers, and other tactical components on AR-15-style rifles and other platforms. It is designed to offer a secure, lightweight, and low-profile alternative to Picatinny rails, with fewer points of contact and a streamlined design.
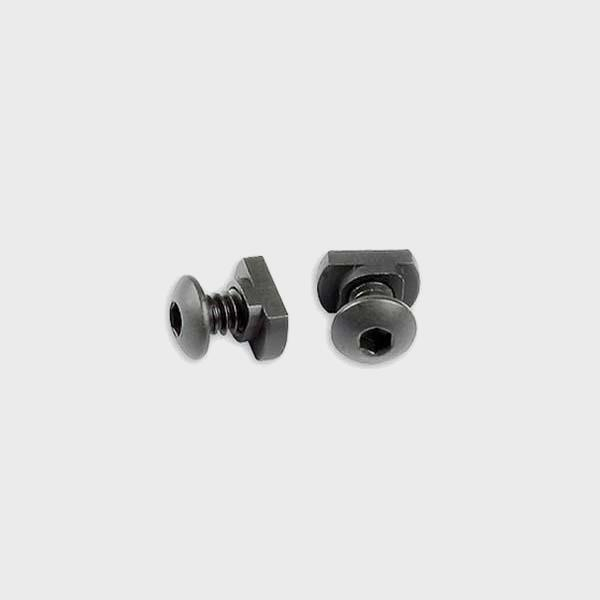
The M-LOK system relies on a set of screws and nuts to secure accessories to the rail slots, so proper installation is critical for maintaining rail integrity and ensuring accessories stay firmly in place.
Step 1: Selecting the Right Screw Length
Choosing the correct screw length is essential to securing M-LOK accessories without damaging the rail or accessories themselves. Using the wrong screw length can cause either under-tightening or over-tightening, both of which lead to issues.
Too Short a Screw
-
Won’t provide enough clamping force to secure the accessory
-
May result in the accessory coming loose over time
Too Long a Screw
-
Can protrude through the M-LOK slots, potentially damaging the accessory or rail
-
Can strip the threads or create unnecessary stress points
To avoid these problems, always use screws of the recommended length, which are usually provided with M-LOK accessories. If you are using screws from a different source, make sure they match the length of the provided screws.
Step 2: Proper Nut Timing
Nut timing refers to the alignment and correct seating of the M-LOK nuts that secure the rail slots to your accessories. Correctly timed nuts ensure the M-LOK accessory is properly aligned and that no rotational force is applied that could result in loosening or failure.
What Is Nut Timing?
Nut timing is the process of aligning the nuts with the slots on the rail. The nuts should fit precisely in the M-LOK slots and be rotated to the correct position so that the accessory is firmly held in place without any slippage.
How to Properly Time the Nuts
-
Insert the nut into the M-LOK slot and turn it until it locks into position.
-
Ensure that the nut is aligned so it cannot rotate once the screw is tightened.
-
Make sure the accessory is placed properly over the nut and the screw holes line up perfectly.
Improper nut timing can result in the accessory rotating or becoming loose over time. Always double-check the alignment before tightening the screws.
Step 3: Preventing Rail Rotation
One of the biggest issues with M-LOK systems is rail rotation, where the rail or accessories shift out of position during use. To prevent this, proper installation techniques and ensuring adequate clamping force are key.
Correct Placement of the Rail
-
Ensure the M-LOK rail is securely mounted to the handguard or receiver with the correct hardware.
-
Make sure the screws and nuts are tightened evenly to distribute pressure equally across the rail.
Securing Accessories Properly
-
Start by inserting the nut into the M-LOK slot and lightly hand-tighten the screws.
-
Slowly tighten the screws until the accessory is securely mounted, but avoid over-tightening, which can lead to stripped threads or warping.
-
Make sure to torque the screws evenly to prevent the rail from shifting during use.
By following the proper torque specifications and ensuring your nuts are seated correctly, you prevent unnecessary movement or rotation in your M-LOK system.
Step 4: Final Checks and Maintenance
Once your M-LOK system is installed and the accessories are mounted, perform a few final checks to make sure everything is secure:
-
Give each screw and nut a final torque check to ensure they are tightened evenly.
-
Test for any rail movement by gently pushing on the accessories to check for looseness.
-
Inspect the M-LOK rail and accessories periodically for wear, ensuring that the screws and nuts haven’t loosened.
Regular checks help maintain the stability of your rail system and prevent issues during shooting or other activities.
Did You Know?
Some M-LOK rails and accessories come with anti-rotation features built into the nuts, which help keep everything locked in place, even under heavy use.
Conclusion
By following these setup tips and maintenance steps, you can ensure your M-LOK system remains secure, stable, and ready for use. Proper screw length, nut timing, and rail installation are the keys to preventing rail rotation and keeping everything in place. For premium M-LOK components and accessories designed for superior performance, check out our collection of AR-15 handguards and accessories.
FAQs
What is the best way to prevent rail rotation with M-LOK?
Ensure proper installation of screws and nuts with even torque, and periodically check the hardware for loosening.
How tight should I make the M-LOK screws?
Tighten the screws firmly but avoid over-tightening, which can strip threads or damage the M-LOK rail.
Can I use any screw for M-LOK accessories?
Always use screws provided with the M-LOK accessories or those specified by the manufacturer to ensure proper fitment and function.
What causes M-LOK rail rotation?
Rail rotation typically occurs when screws aren’t evenly tightened or if the nuts are not properly aligned with the M-LOK slots.
How do I know if my M-LOK system is properly installed?
Once installed, check for movement or instability in the rail or accessories. A properly installed M-LOK system will feel solid with no noticeable shifting.